BAKING HOTLINE
Bring us all your baking and cooking questions! The Gourmandise School Hotline is open everyday from 10:00 a.m. – 7:30 p.m.
3 Ways To Contact The Hotline
1. Email [email protected]
2. DM us on Instagram @GourmandiseLA
3. Call us at (310) 656-8800
Does your pie do this?
Avoid the dreaded soggy bottoms by adding enough starch to your fruit fillings to absorb the fruit juices as they cook out, bake your pie thoroughly (nearly an hour for double-crust fruit pies!) and allow the pie to cool completely before slicing and serving. This will make for the perfect sturdy yet flaky shell encasing your delicious fruit fillings!

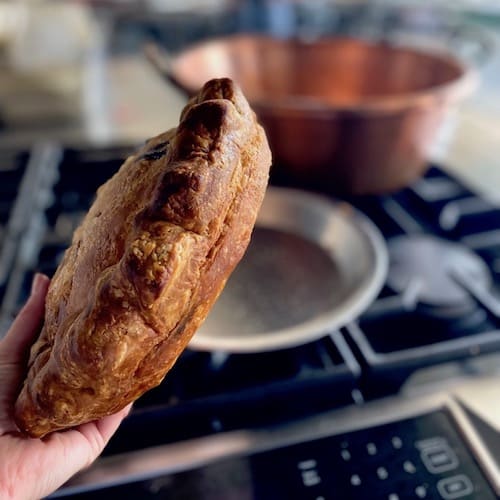
Great croissants CAN be made at home- with a few simple techniques and good ingredients. Our single biggest tip is to keep the butter both cold and pliable as you lock in, roll out and fold your dough. We’ve got both in-person and virtual croissant classes for when you’re ready to master laminated doughs.
More Questions, and Answers!
Domed Cakes
Q: Why do my cakes dome so much (and end up undercooked inside)?
A: Try turning your oven down. Your oven’s heat radiates to the cake pan, which then distributes heat to the batter, allowing it to rise evenly. If your oven runs too hot, the heat radiates too quickly on the side of your cake pan and to the exposed part of your cake on top. This burst of heat encourages too quick a rise and sets up, or hardens, on the top of the cake and its sides before your center has a chance to catch up and set. Every oven behaves differently, so adjust accordingly. On another note, you should try to use light-colored aluminum pans over dark ones, as the latter will encourage more browning and quicker cooking on the sides.
Collapsing Cakes
Q: Everything I bake collapses.
A: I know it’s hard, but you’ve got to stop checking on your baked goods! The oven is doing its job, so don’t fret. Picture your oven as a pressure chamber. In order for your muffins, cakes and breads to rise, you need a fair amount of pressure for steam to build up in the batter. Your oven is radiating heat to your pans, but it’s also creating an environment for steam to build up, and if you open the oven door too early in the baking process, you’re essential de-pressurizing the chamber. This causes your delicate batter to collapse, and it won’t gain the strength to build back up again. My rule? Don’t risk it and peek only after 2/3 of the baking process has passed. If your glass window in the oven door is looking a bit rustic, grab a razor blade and carefully scrape the film off.
Cookies Spread Too Much
Q: My cookies always spread really thin and burn around the edges. I prefer a thin cookie, but not so much that they fall apart. I added flour last time but they ended up dry and tough. Do you have any suggestions?
A: Start with cold butter. I know- you’ve heard the opposite for ever and ever, but I promise you- if your butter was a tad bit colder, your cookies wouldn’t spread nearly as much. I take the butter out of the fridge and cut it up, leave it on the counter for a few minutes and start creaming.
Substituting Baking Soda and Baking Powder
Q: Hi Clemence! I’m really confused about the difference between baking powder and baking soda. Does it really make a difference, or do I have to run to the store again? Oh, and can I just use the baking soda that keeps my fridge smelling pretty?
A: Oh, this is a great question! Baking Soda (sodium bicarbonate) is used in recipes that already have acidic ingredients (think: buttermilk, sour cream, lemon, et al). During the baking process, baking soda will react with the acid in the batter or dough and release carbon dioxide, which in turn ‘lifts’ the yummies in your oven to create a rise. Try pouring vinegar over baking soda and watch it fizzle- it’s the same reaction!
Baking powder, on the other hand, is made for batters that lack acidity. Baking powder is made of baking soda plus an activating agent in order to create the appropriate release of carbon dioxide. The acid most often combined with baking soda is cream of tartar, or tartaric acid (a byproduct of the wine-making process). You will notice that some recipes call for both baking soda and powder, which means the recipe has just a little acidity to it, but not enough to carry the entire dough or batter.
Don’t have baking powder in the house? No worries! Make your own by mixing 1 tsp baking soda, 2 tsps cream of tartar and a teaspoon of cornstarch. And to answer the last question, mmmm- not really, unless you like garlic-scented chocolate chip cookies!
Weighing vs. Measuring
Q: Will you please explain why some of your recipes are in grams?
A: I’m a metric girl at heart (let me preface by saying that I hate math-sorry, Mrs. Smith)! My first cookbooks were French ones, where cups and teaspoons were non-existent, but a scale was mandatory. Though using a scale may seem daunting, it’s actually quite liberating. If often receive questions about recipes coming out differently each time they are made, or why the flour at the bottom of the bag yields less in the cup; it’s all in the measurement (the flour at the bottom of your bag is about 30% more dense than the fluffed up stuff up top)
SO- I recommend every home baker purchase a scale. Why? You’ll get the exact same results from your recipe every single time and there is NO COUNTING. Have you ever measured out 5 cups of flour and had to start over when you lost count? All you have to do with a scale is read the numbers, press tare/zero and weigh out the next ingredient, all in the same bowl! If you’re ready to take this step, make sure that the scale weighs in both grams and ounces and that it is battery operated (much easier when you aren’t tethered to a plug). I weigh everything except baking powder, baking soda, salt and extract- it’s easier to use measuring spoons for those ingredients.
My muffins turn out different every time!
Q: Hi there. Thanks for the hotline. I think I’m a pretty good baker, but my grandmother’s ‘foolproof’ muffin recipe turns out horrible at least half the time. Same for my favorite pound cake. What give? Thanks again, any advice is appreciated.
A: The most common issue with consistency is in the measurements (see question re: scale). When using cups, we run the risk of adding too much or too little flour, brown sugar, fruit, etc. The flour at the bottom of the bag is usually denser than at the top and brown sugar can have more or less humidity (and might be more difficult to pack).
If you have any kind of small scale at home, try this test: Fluff up, or ‘sift’ the flour at the top of the bag. Scoop out one cup of the flour, level off and weigh (in grams). Now shake the bag a bit from side to side (to allow the flour to settle down into the bottom), scoop out another cup, shake it down in the cup, level and weigh. You should see a dramatic difference in weight though you used the same volume-measuring cup.
The best way to ensure that you get the recipe right from now on is to measure and weigh your ingredients, recording them and seeing which recipe turned out best. From then on, weigh! Feel free to email me with scale recommendations, they don’t cost much but can really be lifesavers.
Secrets of A Flaky Pie Crust
Q: What makes a pie crust so tender and flaky? Why does mine shrink when I bake it? How can I keep it from tearing?!?.
A: It’s simple; a flaky texture comes from the many layers of cold butter, air, flour and dough. The secret? Stay cold, handle less!
- Be sure to use very cold ingredients; I measure mine out and freeze the butter and water for 10 minutes before getting started.
- Be kind! Rub the butter between your thumb and fingers, but only until you’ve flaked it into pieced about the size of your thumbnail. If using a food processor, you’ll want to pulse it just so the dough barely resembles a uniform mass once you’ve added the water. You’ll WANT to see little pebbles of butter in there; like a good steak, your crust should be marbled with fats.
- Once your dough comes together, wrap it in the shape of a flat disc and refrigerate for at least one hour (or freeze if you’re in a hurry)!
- Work the dough as little as possible! Remember, the minute the butter begins to soften, you’ll lose flakiness.
Dry Cupcakes
Q: How can I prevent that ugly brown line on the bottom of my cupcakes? I tried doubling up the cupcake liners but that didn’t work. Is this even possible?.
A: Don’t worry! All you need to do is to place the cupcake pan (or muffin pan) over a cookie sheet in the oven. This helps to distribute the heat more evenly and prevents the bottom of your little cakes from developing that dreaded dry and overly browned base. Stick with light-colored aluminum pans, too; the darker ones tend to brown the cakes more quickly.
Bringing butter to room temperature
Q: Can I microwave eggs and butter to get them to room temperature?.
A: Bringing all your ingredients to room temperature before baking is important in most baking recipes, but you don’t have to leave the ingredients out the night before- or nuke them! Simple place your whole, un-cracked eggs in a bowl of warm water for 5 minutes and open and cut your butter into small pieces and wait 10-15 minutes. Milk can also be brought to temperature by placing desired amount in a saucepot and heating it- just barely on low- until you’ve taken the chill off.
What is Gianduja?
Q: What is Gianduja?
A: Gianduja is chocolate, most often milk, that is combined with nuts or a nut paste. This chocolate tends to be very soft, so keep it cold before shaving. If you don’t have this chocolate handy, substitute with any other chocolate and if you like, adding in your favorite nut butters.
How do I make chocolate shavings?
Q: How you shave chocolate?
A: A vegetable peeler works best! For small shave pieces, use the chocolate cold or at room temperature. For larger curls, rub the piece of chocolate with the palm of your hand and use more pressure as you ‘peel’ the curls away!
Storing Chocolate
Q: Dear Gourmandise, How am I supposed to store chocolate? I bought a lot of bags of chips when they were on sale and keep them in my freezer. Last time I took some out to bake, I noticed they went bad and got a weird powder on them.
A: Don’t worry! The gray color on your chips doesn’t mean they went bad. When chocolate is kept in an environment that’s too warm or humid, or if there’s been a big shift in temperature, the cocoa butter in the chocolate ‘rises’ to the top, creating what is called a bloom. Keep your chocolate tightly sealed in a cool, dark place. Cabinets that are furthest away from sinks and your stove are best. Try to avoid storing your chocolate in the fridge or the freezer.
Burnt Cookies
Q: My cookies always seem burnt at the bottom; what am I doing wrong?
A: Using a light-colored aluminum baking sheet, commonly called a half sheet pan, really helps here. We recommend losing the cooling rack and baking cookies until just golden on the edges. Remove the cookie sheet from the oven and let the cookies finishing setting and cooling on the cookie sheet they were baked on (which means you can let go of whatever special cookie spatula you think you needed). Keep it simple!
Wax vs. Parchment
Q: What is the difference between parchment and wax paper?
A: Wax paper is coated with paraffin, and though it is food-grade, we don’t recommend using it anywhere near heat! Go ahead and wrap your sandwiches with wax paper and bake your cookies, cakes and roast all manner of vegetables with parchment paper. We love (and sell) flat, half-sheet sized unbleached parchment paper sheets.
Pan Banging Cookies
Q: Why aren’t I getting those ripples in the famous pan-banging cookies? I open and close the oven several times and it doesn’t seem to work!
A: Wait until the last couple of minutes of baking before starting to tap the cookie sheet against your oven’s shelf. Close the oven right after, wait 2 minutes and repeat 2-3 more times.