Cherry Hand Pies
Hand pies are the best way to give yourself a pie pick-me-up without waiting an hour for a pie to bake and another hour for her to cool. These pocket-sized pies require little skill other than what you perfected with Play-doh sets and work with jam as the filling just as well as our DIY cherry pie filling. This crust recipe will yield 8-10 4″x4″ hand pies.
Print Recipe
Pin Recipe
Ingredients
- 1 lb Cold butter
- 2 tsp Kosher salt
- 2 Tbsp Sugar
- 5 cup All purpose flour
- 2/3 cup Ice cold water
- 1 Egg for egg wash
- 2 cup Cherry pie filling cooled, or jam of your choice
- 2 Tbsp Milk for milk wash
- 2 Tbsp Coarse sugar we like plain Organic sugar
Instructions
- If using a food processor, pulse your flour, salt and sugar for a few seconds. If you’re doing this by hand, simply mix them to disperse the salt and sugar well.
- Add your butter and pulse until you no longer hear the large chunks bouncing around. This should take between 8-10 quick pulses. If doing this by hand, use your fingers to rub the cold butter into the flour or a pastry cutter to cut the butter pieces into the flour. We like to flake the butter between your thumbs and index fingers until the butter pieces are flaked to about the size of your thumbnail.
- Once you’ve flaked the butter add the water. Pour into the food processor as you pulse, just until the dough starts to come together in clumps. If doing this by hand, pour the water in and using your hands as large scoops, shoveling the water into the bowl to create a shaggy dough. You may need to use the extra water, as your hands will absorb some of it. Once you can squeeze the dough and it just starts to stay together, you’re done. Don’t add so much water the dough feels sticky. If it does, simply toss in a little more flour. Press the dough into two flat discs, wrap and chill for at least an hour in the fridge or for up to a couple months in the freezer.
- On a well-floured surface, begin to roll out your dough. The best way to roll out pie crust is to place your rolling pin (flour it first) on the center of your dough. Move forward, stopping just shy of the edge of the dough, then move backwards. Turn your dough a quarter turn, adding a touch of flour to the counter if you feel the dough sticking, and repeat until the dough is a little thinner than a piece of card stock paper.
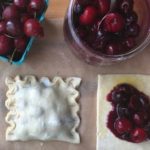
- Cut your hand pies out either in long rectangles (about 3″x9″) or with round cookie cutters and place on parchment-paper lined cookie sheets. Brush a little bit of beaten egg on one half of the rectangles or on half of your round cut-out pieces. Place the pie filling or jam over the egg wash, leaving room all over the edges for sealing.
- Fold over the rectangles or place a second cut out round of pie dough over the filling, pressing lightly to seal. You can crimp these if you like as well.
- For best results, freeze the hand pies for at least 10 minutes (or for months)! Preheat the oven to 375F. Brush the tops of the hand pies with milk and sprinkle with sugar. Cut or slash a little hole in the middle of each hand pie. Bake for 12-20 minutes, depending on their size (you’re looking for pies to start browning to the color of light brown sugar).
- Be careful! The filling is super hot once you take the pies out of the oven. Be sure to wait a few minutes for them to cool.